Use ILMerge in PostBuild Event
December 23, 2014
There are several reasons to use ILMerge after a build. In case of a CRM Plug-In for example you cannot reference any Assemblies but those included in the CRM SDK and the .NET Framework itself. Well of course you can, but there are several disadvantages. Since you need to deploy those third party libraries to the GAC or the Server\bin\Assembly directory, you cannot have different versions of those libraries for a multitenant environment. And after all you will be completely unable to deploy your Plug-In to a CRM Online/Office365 organization.
So usually one would go ahead after compiling the assembly and do a ILMerge on the command line or use a batch file that is executed after the build.
In this article I will show, how to include the ILMerge in the build itself. In the end, the build in Visual Studio will generate the merged assembly. Also there will be no additional steps required to have an automated build in Team Foundation Server (or whatever your favorite CI platform may be) to have the build generated the merged assembly as well.
Even if I use a CRM Plug-In in this example, this technique of course can be applied to any library or executable supported by ILMerge.
So let’s get started.
Create the project
For this example, I will create a new project in Visual Studio called “MergedPlugin”. I will also create a Solution that contains the project. Since there is nothing I hate more than getting something from version control and being unable to compile, I create a folder called “_lib” in my solution, which will include all third party libraries necessary for the build. This will also ease the process of creating an automated build in TFS later on. For this example I will use the SharePoint Client SDK as my third party library that needs to be merged.
Note: Do not merge SharePoint Libraries into your Plug-In, if SharePoint is installed on the same machine as CRM as you will get errors during plug-in execution.
Additionally if you already haven’t download and install ILMerge, which can be obtained here. I also include the ILMerge.exe in my _lib folder. As a result, my solution now looks as:

Apply ILMerge
To include ILMerge in the msbuild process directly, we need to manually edit the project file. Therefor first unload the project by right clicking and choose “Unload project” from the context menu. Next open the project file in the Visual Studio editor by right clicking –> Edit MergedPlugin.vbproj (of course you will find here the actual name of you csproj/vbproj file). Now the project file will be opened in the XML editor.
Scroll down and locate the commented build target named “AfterBuild”:

Since we have to apply ILMerge after the Core Build executed, uncomment the AfterBuild-target. Next I will define two build properties. One which holds the output directory, since I cannot directly overwrite my assembly with ILMerge, so I will use a subfolder in the actual build output directory. The second is a shortcut to my _lib directory which holds the ILMerge.exe and my third party libraries. This is done by adding the following PropertyGroup to the AfterBuild target:
<PropertyGroup>
   <MergedDirectory>$(OutDir)Merged</MergedDirectory>
   <LibDirectory>$(MSBuildProjectDirectory)\..\_lib</LibDirectory>
</PropertyGroup>
Next the output directory holding the merged assembly has to be created, making sure the build will not fail, if it already exists. This is done by adding the following line below the PropertyGroup:
<MakeDir Directories="$(MergedDirectory)" ContinueOnError="true" />
When the directory has been created, ILMerge will be executed using the Exec target from msbuild, which basically executes any command-line command including parameters. Remember, since this is XML, we have to encode quotation marks. For further reference of parameters supported by ILMerge just type ILmerge /? on the command line. I will use the following parameters:
- t: Specify I want to create an assembly, not an executable
- keyfile: I want my merged assembly to be signed with a strong name key
- lib: Specifies the directory containing my third party libraries
- out: The filename of the merged result.
The last parameters are the assemblies I want to have merged. If you do not specify a full path, then ILMerge will look those files up in the directory specified by the lib parameter.
<Exec Command=""$(LibDirectory)\ILMerge.exe" /t:library /keyfile:"$(MSBuildProjectDirectory)\MyKeyFile.snk" /lib:"$(LibDirectory.TrimEnd('\'))" /v4 /out:"$(MergedDirectory)\$(AssemblyName).dll" "$(OutDir)$(AssemblyName).dll" Microsoft.SharePoint.Client.dll Microsoft.SharePoint.Client.Runtime.dll" />
After adding a few lines of build messages in between, the AfterBuild target now should look like:
<Target Name="AfterBuild"> <PropertyGroup> <MergedDirectory>$(OutDir)Merged</MergedDirectory> <LibDirectory>$(MSBuildProjectDirectory)\..\_lib</LibDirectory> </PropertyGroup> <Message Text="Creating Merge-Output-Directory..." /> <MakeDir Directories="$(MergedDirectory)" ContinueOnError="true" /> <Message Text="Merging Assemblies..." /> <Exec Command=""$(LibDirectory)\ILMerge.exe" /t:library /keyfile:"$(MSBuildProjectDirectory)\MyKeyFile.snk" /lib:"$(LibDirectory.TrimEnd('\'))" /v4 /out:"$(MergedDirectory)\$(AssemblyName).dll" "$(OutDir)$(AssemblyName).dll" Microsoft.SharePoint.Client.dll Microsoft.SharePoint.Client.Runtime.dll" /> <Message Text="Assemblies merged" /> </Target>
Now save and close the and reload the project.
Result
After compiling, there should be a subdirectory names “Merged” in you build specific output folder (e.g. bin\Debug) which contains the merged assembly with the same name as the original assembly, signed by the same key.
If you get build errors, you might need to adjust the directories to your actual folder structure. You can use the build output console as a hint to figure out the actual command.
The assembly will also be merged in any automated build without additional steps necessary – of course, as long as you check in the _lib folder as well.
If you have CRM 2011 and UR 15 you maybe know this error.
In your CRM organization you have added a custom entity and a system view for this entity. For the system view you have added one or more columns of an entity that is related to the custom entity (1:n).
You have created a custom report for the new custom entity, upload this report to the CRM, change the defaultfilter and save it.
If you try to execute the report, the execution fails with the following error on screen: “Reporting Error: The report cannot be displayed”
and the following is logged in the platform traces
Crm Exception: Message: Table alias <name> is not unique amongst all top-level table and join aliases.
Then you have an incorrect fetch XML in the defaultiflter of the custom report.
So to fix this there are two options:
- Delete the report and upload it again
- Directly update the FetchXML in the database
The second way is unsupported and only works for on-premise. But if you canot delete and re-import the report it might be the only way to solve the problem.
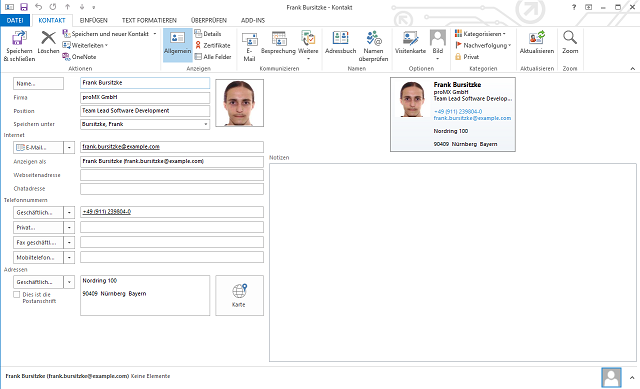
Save contact as vCard from Microsoft CRM 2013
April 16, 2014
Our new solution proVCard allows to download a contacts information as vCard (*.vcf) directly from CRM. It includes standard fields from CRM that match the vCard specification. And yes, it even includes the contacts image!
Since it uses a widely used format, the vCard can be imported to Outlook, mobile devices and virtually any PIM you can think of.
The solution is designed to work with Microsoft CRM Online and OnPremise.
If you want to learn more, please contact us via the contact form below.